Here’s a secret: I am actually a really bad photographer. Despite years of traveling with a professional camera, I still barely know how to use it. My photographer friends who’ve traveled with me know this, and I often end up asking them stupid questions, like how do I zoom in (yes, I really asked that once) or where the manual focus setting is. What I’m saying is, you don’t need to be a tech whiz or master of photography to take decent photos. Here are 6 simple hacks to instantly improve your travel photos, even without a camera!
Photography for Lazy People
The inspiration for this guide, is drawn from my own experience on trying to capture the amazing things I encounter on my trip. I have been taking photos for years, but I am still a total beginner. Why? Because while I love the creative aspect of photography, I hate the technical stuff.
If you want to be great, there’s no way around it, and you’ll have to learn to do more than just turn on a camera. However, to be just good, you just need to know a few basic rules. There are easy tricks that can instantly improve your travel photos, without you having to put in huge efforts. You don’t even need a camera, these work on your phone!
6 Hacks to Improve Your Travel Photos
1. Zoom In
I used to take photos that had too much empty space or not enough detail of the subject I wanted to capture. While we might think a photo is better if we capture more of the scenery in it (this is true for landscapes), in general, a lot of things look better if you zoom in.
Here is an example:
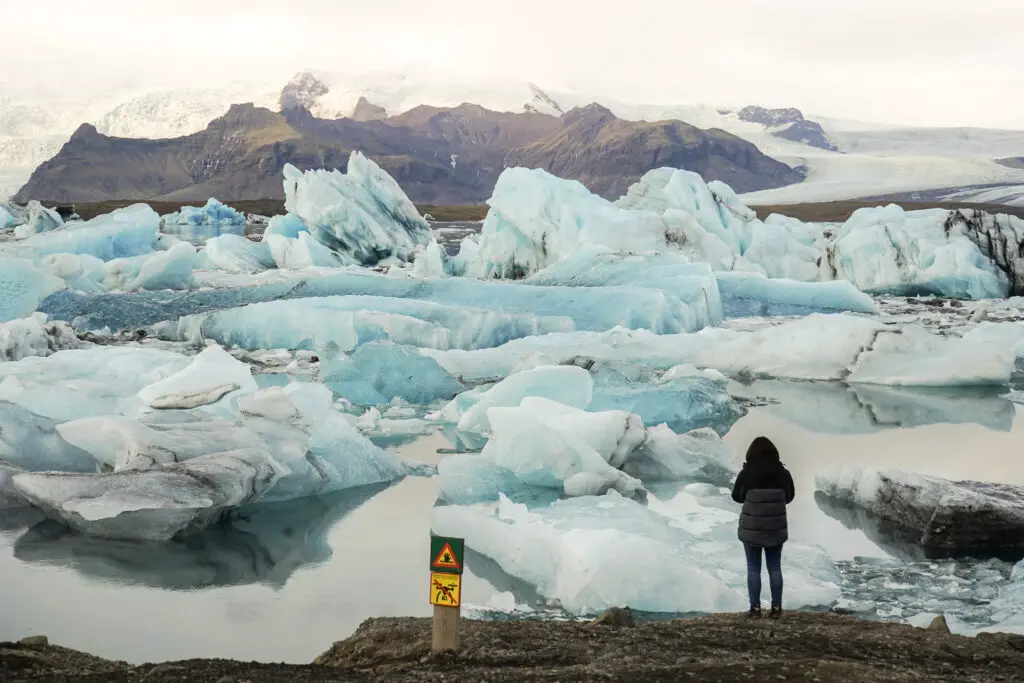
In the first photo I pointed and clicked. I captured as much of the scenery as I could. While there is nothing wrong with this photo, it doesn’t show details or the scale of the icebergs.
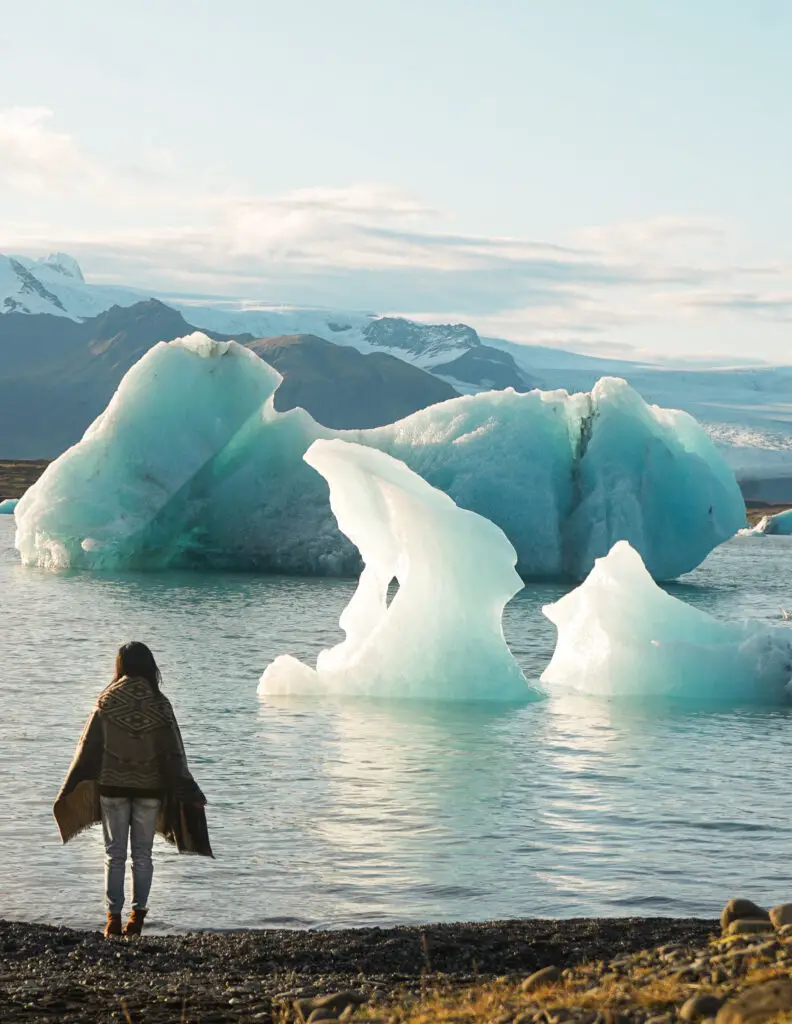
In the second photo, I zoomed in. You can now clearly see the subject (me) and focus on the shape of the icebergs. There’s more detail, and you get a better sense of their size because each one takes up more space in the photo.
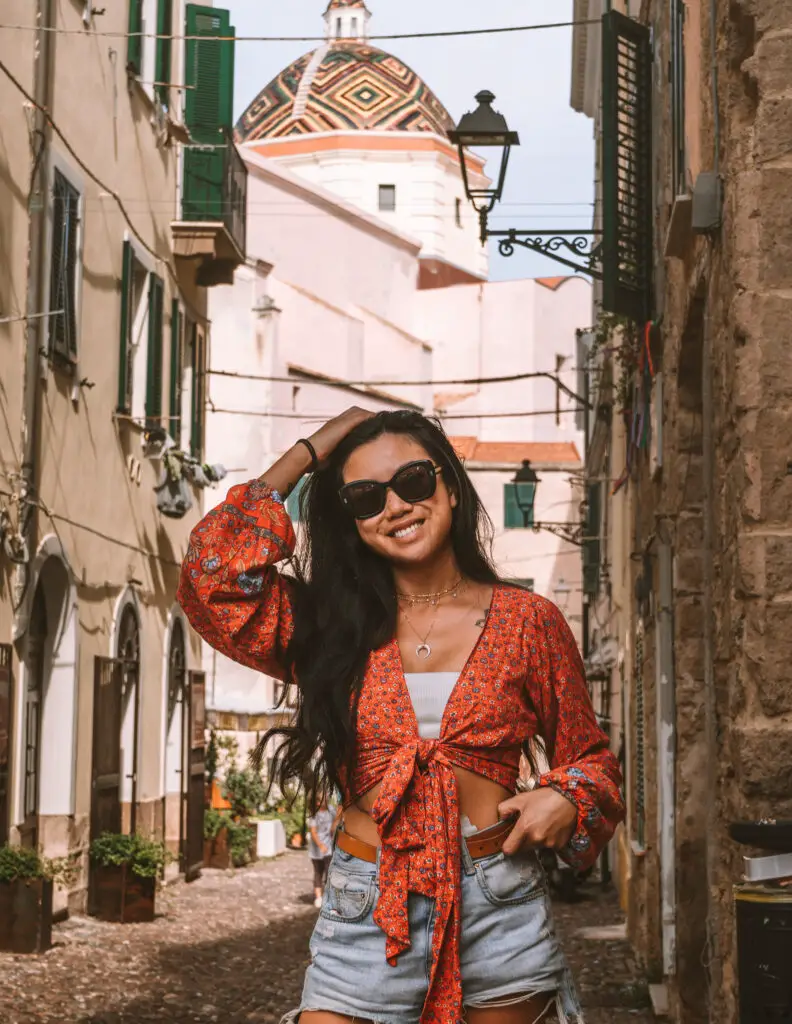
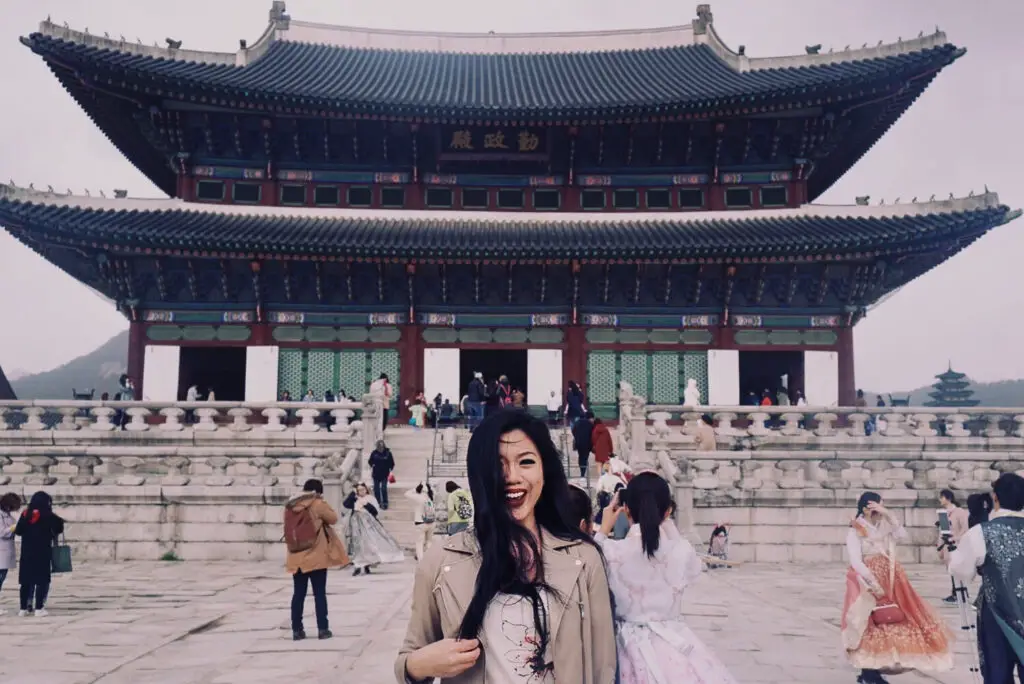
The same rule applies to buildings and structures.
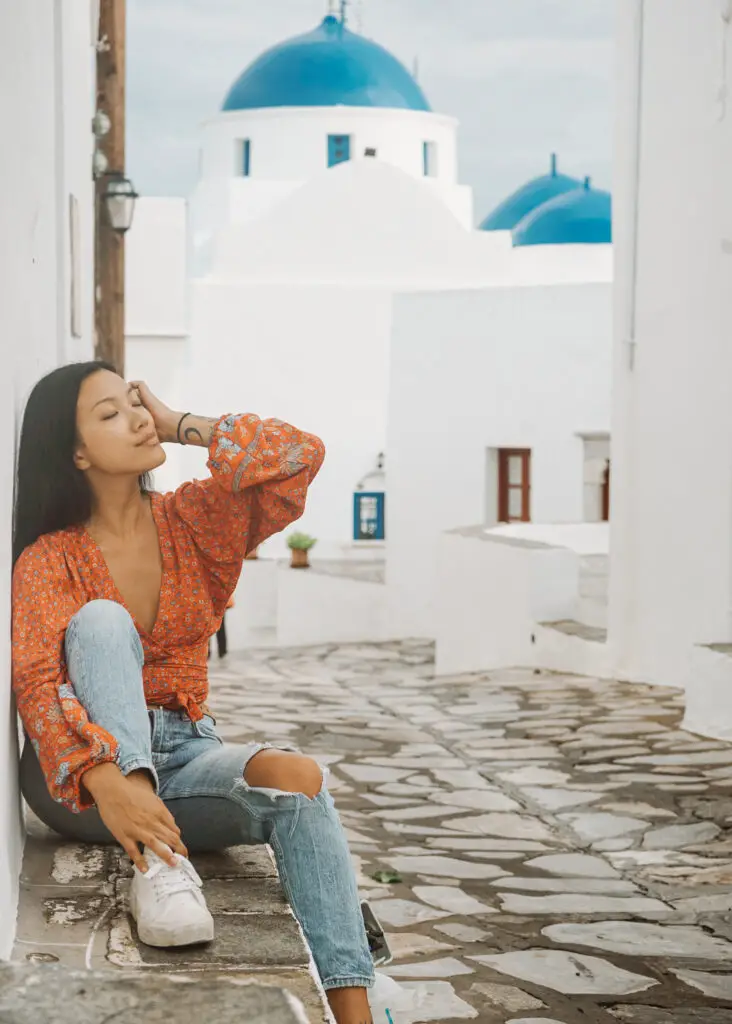
Using the example above, I zoomed in to make the church domes more prominent in the background. I didn’t want to capture too much sky here and I want the domes to look bigger than the subject (me).
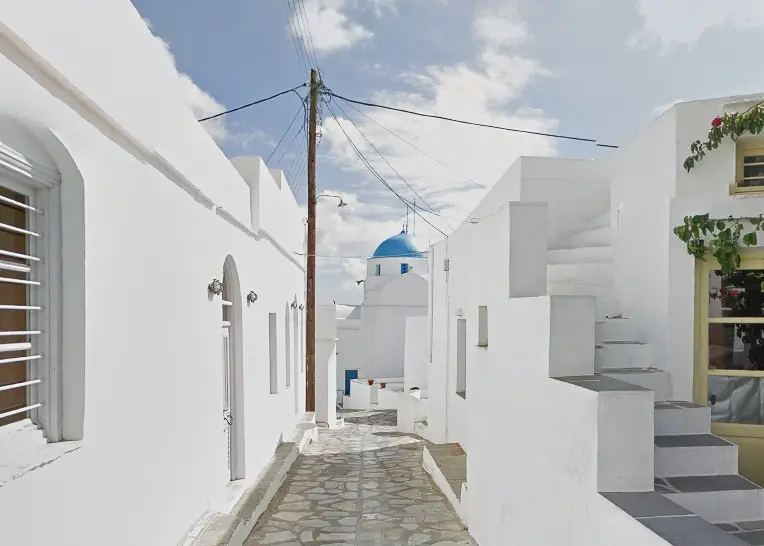
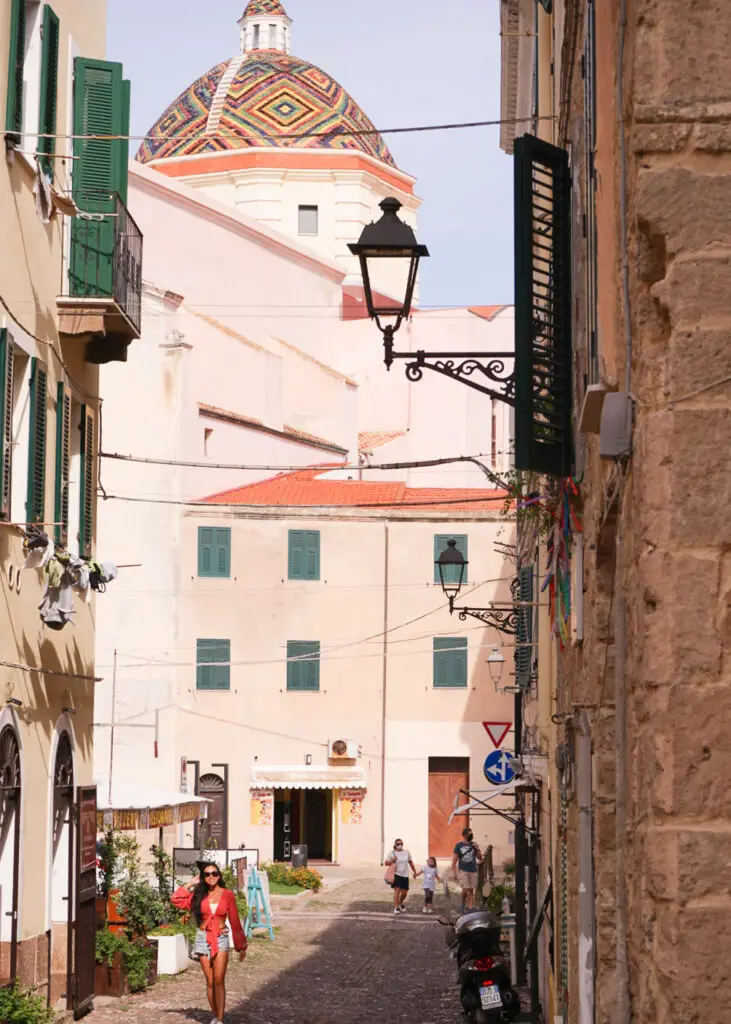
Above is an example of how this exact alleyway looks if I had not zoomed in. The domes are much smaller, and not nearly as impressive.
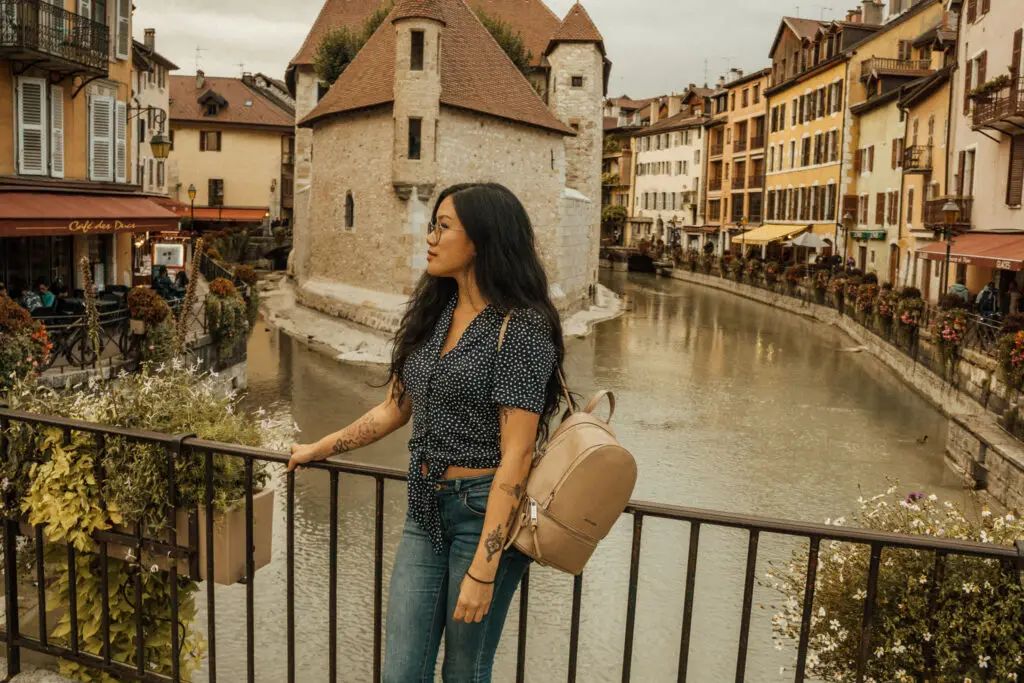
2. Stand Closer to the Camera
A lot of my older travel photos look the same: I am standing a good distance from the camera, with full body in frame, staring directly at the camera.
While there is nothing wrong with that, generally, these photos tend to look boring. Plus, if you are in a busy place, you, as the subject, will not stand out with a lot of people in the background.
You can fix this by standing closer to the camera. This will make you, the subject, clear. Plus, you can block out any people in the background if needed, and it just creates a better composition overall.
Example where I am standing close to the camera below:
When standing closer to the camera, you will take up more space in the photo, which can be favorable.
Below is an example of if I stood further away from the camera.
The distance is quite exaggerated, but you can clearly see why standing closer makes the photo look better in this case.
Of course there are times a photo looks better with a smaller subject, such as a landscape photo where you want to show the scale and vastness of a place. In that case, it’s ok if the person looks tiny in the photo.
3. Avoid Shadows
When you are not yet used to photography, you may not realize how much lighting matters. You may not know that many photographers will wake up an hour before sunrise to capture the golden hour lighting for their photos.
While you don’t have to do this, I will say that you should avoid harsh shadows in your photo. These are usually the worst during midday, when the light from the sun is very strong, creating dark shadows, and washing out the details in photos.
Of course, most travelers are not basing their daily activities around capturing perfect lighting. So some easy steps to avoid harsh light and shadows are:
- Take photos in the morning
- Take photos in the late afternoon to sunset
- If you have to take photos in midday, don’t shoot towards the sun
Here are two unedited photos for reference:
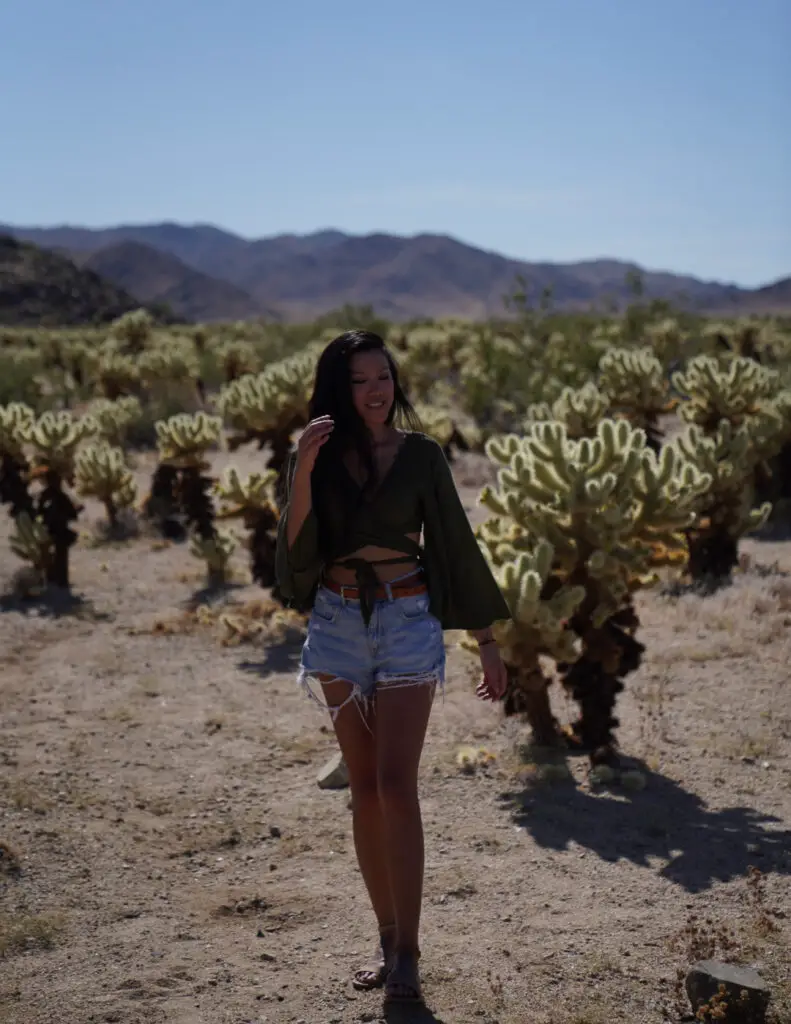
The photo above is an example of what happens when you shoot during midday, and against the sun. My body is dark, and the cactuses form huge blobs of shadows on the ground.
While there are ways to edit this to be a good photo in the end, this is a guide for lazy people. To improve your travel photos, with less work, aim to shoot better photos. The better the photo is that you take to begin with, the less work you’ll have to do in the post (time spent editing).
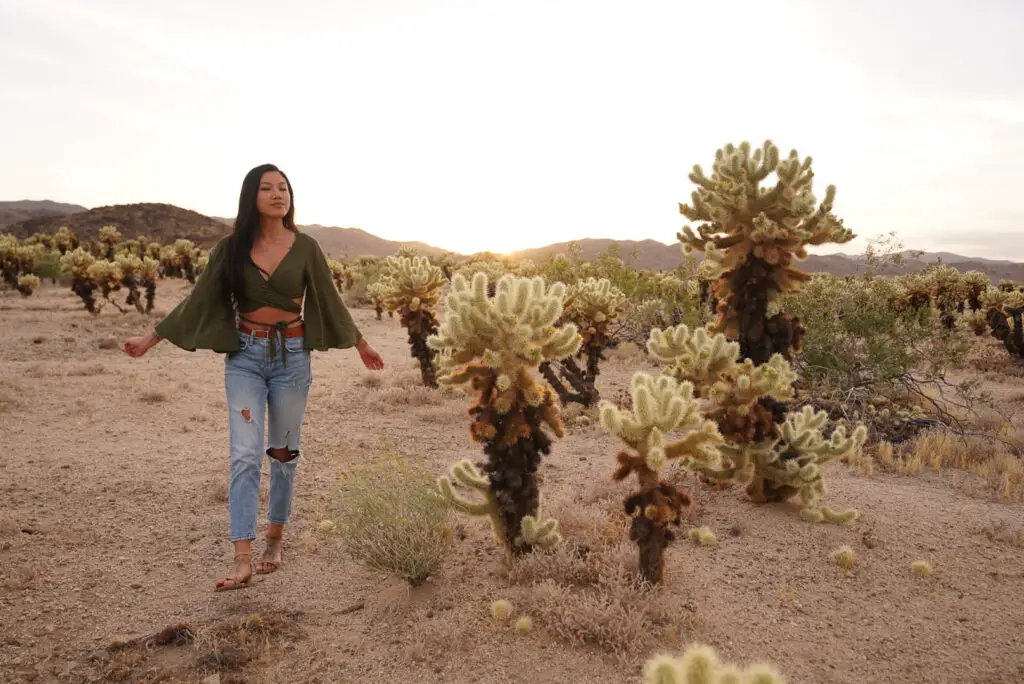
Above is a photo taken in the same place, with the same camera but at sunset. See how there are no shadows, the lighting is nice and soft, and my body isn’t dark.
4. Don’t Block the Background
An obvious, but sometimes overlooked way to improve your travel photos, is to not cut off or block the background.
As a solo traveler, I often ask other people to take photos of me. I notice that a lot of people don’t actually try to “see” what they are capturing, instead just point and click.
Sometimes, they will try to capture my full body, and instead cut off half the top of the castle behind me. Or, they will position themselves, so that I am blocking important parts of the background.
If you are taking a travel photo, you want yourself in it, but more so, the important thing is the background. You want to capture the place you’re visiting!
So the tip here, is to train yourself to not just “see” what’s in front of you in real life, but to “see” what the camera sees. Take photos in a way that capture the best parts of the scene. Basic tips for this are:
- Check that you didn’t cut off the top of something important (like the castle)
- Check that the subject isn’t blocking anything important behind them
- Check that there isn’t something ugly blocking the background (like a random car that drove by)
If you messed up one of the above, just retake the photo.
Above is a good example. The entire castle is in frame, and I am not blocking any part of it.
5. Foreground and Framing
What I see a lot, is that when people take travel photos, they tend to just point and shoot. I used to do the same. We think, that if we point towards what we see, then surely the camera will capture exactly that.
But we don’t realize that our eyes are taking in everything, even peripheral details that come together to create this amazing scene we see in front of us. That’s why when we shoot, for example, just a temple, it looks kind of lame. You need to capture some foreground or frame the subject to give it context and add depth to the photo overall.
Real photographers will tell you, you need a foreground, midground and background. I’m here to simplify it for you and say, you want to have at least 2 elements in your picture.
Generally, if your photo only has one, it will look incomplete.
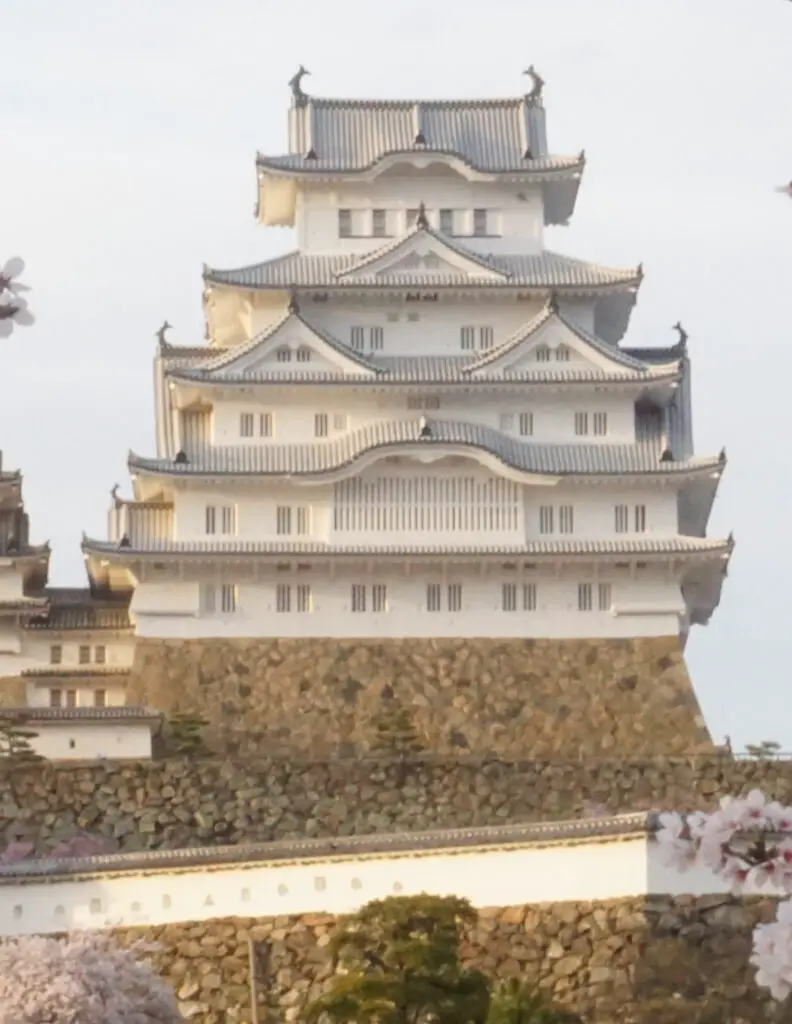
Using the temple as an example below: here you can see, if I only had the temple, it would look boring.
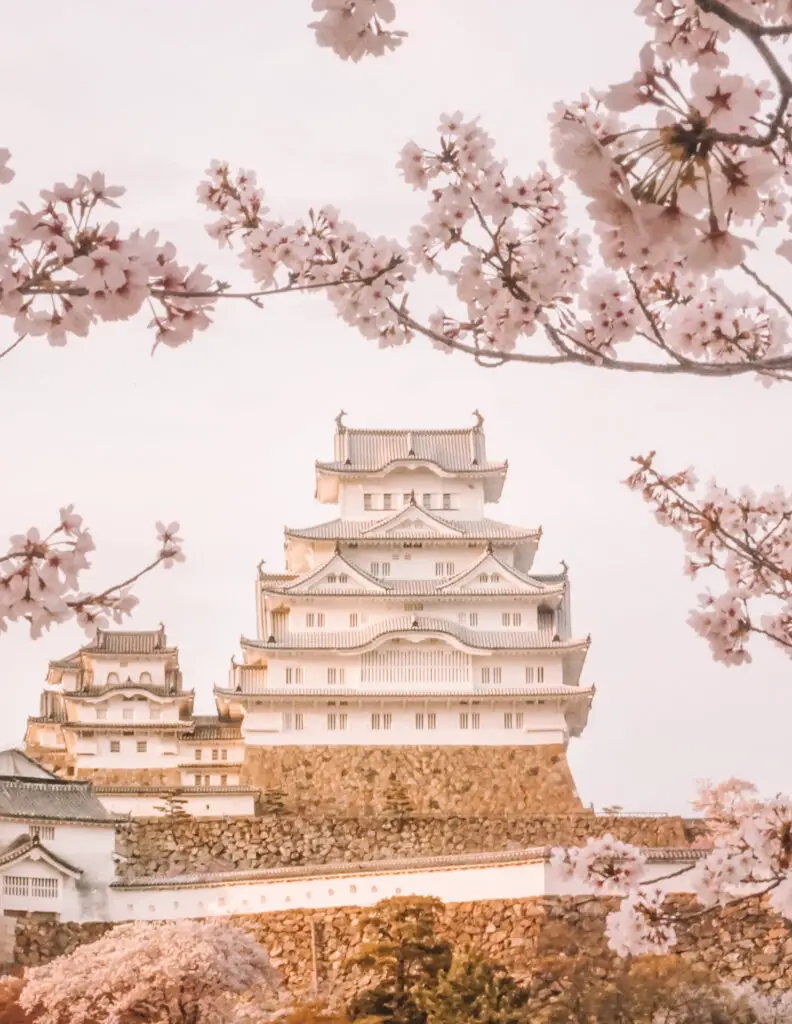
Adding some framing: in this example I used the cherry blossoms as a frame. You can see it looks much better.
In the example below, (ignoring the fact there are a million people in the background) I added myself to add another element to the photo. Otherwise, it’s just the temple and it would look a bit boring.
By using myself as the subject, it also adds a sense of scale to the temple (you can see how big it is compared to me).
6. Use Angles
Before you take a photo, take a quick second to experiment with the angle. Go low, then high, and look at the screen while you do this to see which angle is best for the photo.
I take the majority of my photos at eye level, but a lot of pictures would not have been possible without using different angles.
Low Angle
You’ll want to crouch down and use a lower angle to:
- Capture really tall backgrounds, that get cut off from eye level
- Make the subject look taller
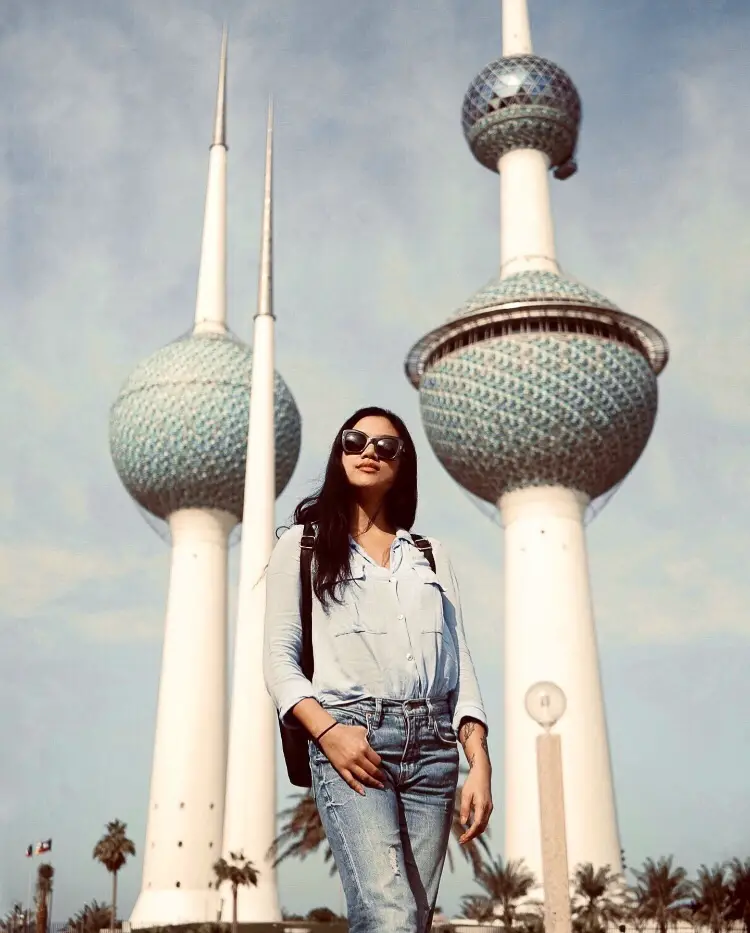
Here is a good example. The Kuwait Towers were too tall to capture in the photo. The camera man could have backed up to get all of the towers, but it actually looked better to just have the camera person zoom in and take it from a low angle.
High Angle
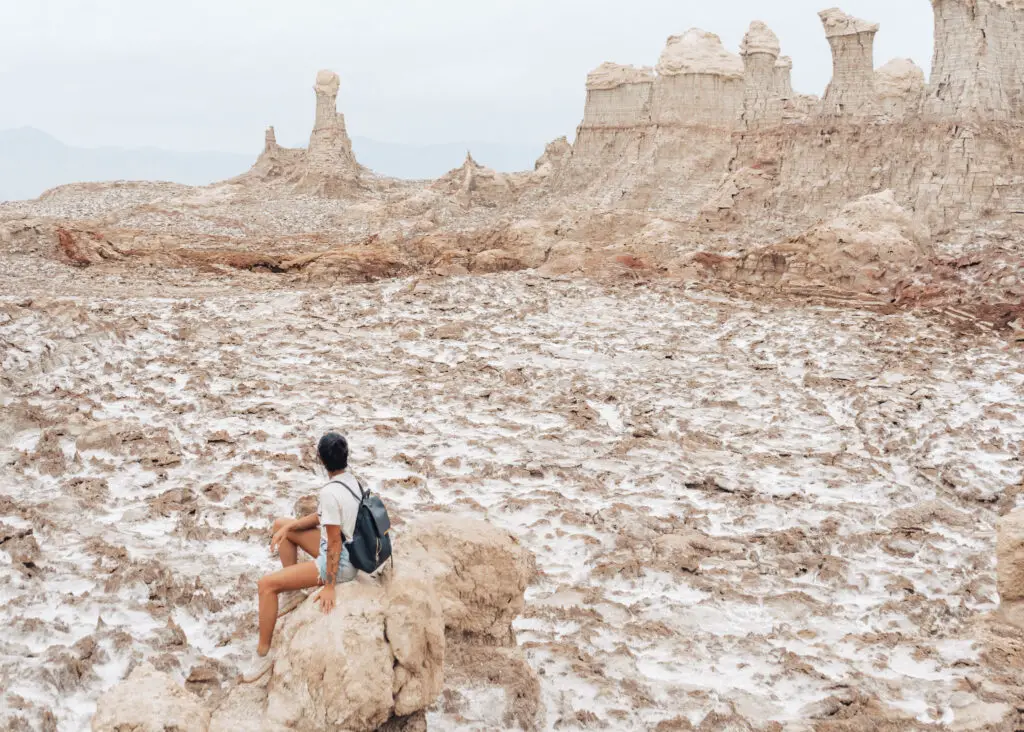
You can lift the camera up, and face it down to take photos from a high angle. Or, you can go as far as to find a vantage point, meaning elevated ground, to take a photo from a higher perspective. Use high angles when:
- Some of the scenery you want to capture is below the horizon (like a canyon)
- If you want to capture more of the mid-ground of a photo (example below)
- You want the subject to look smaller
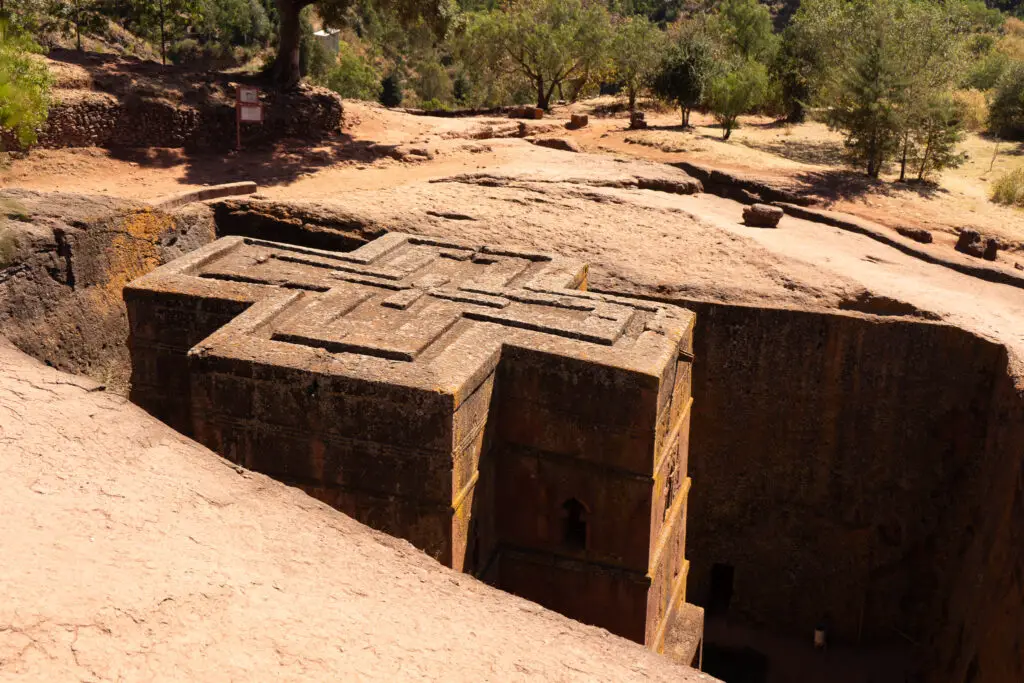
The photo from Ethiopia above was taken from a vantage point a few meters higher than the subject, to show how deep the hole is.
If it was taken at eye level, you would see less of the cross shape as well, as it would look flatter.
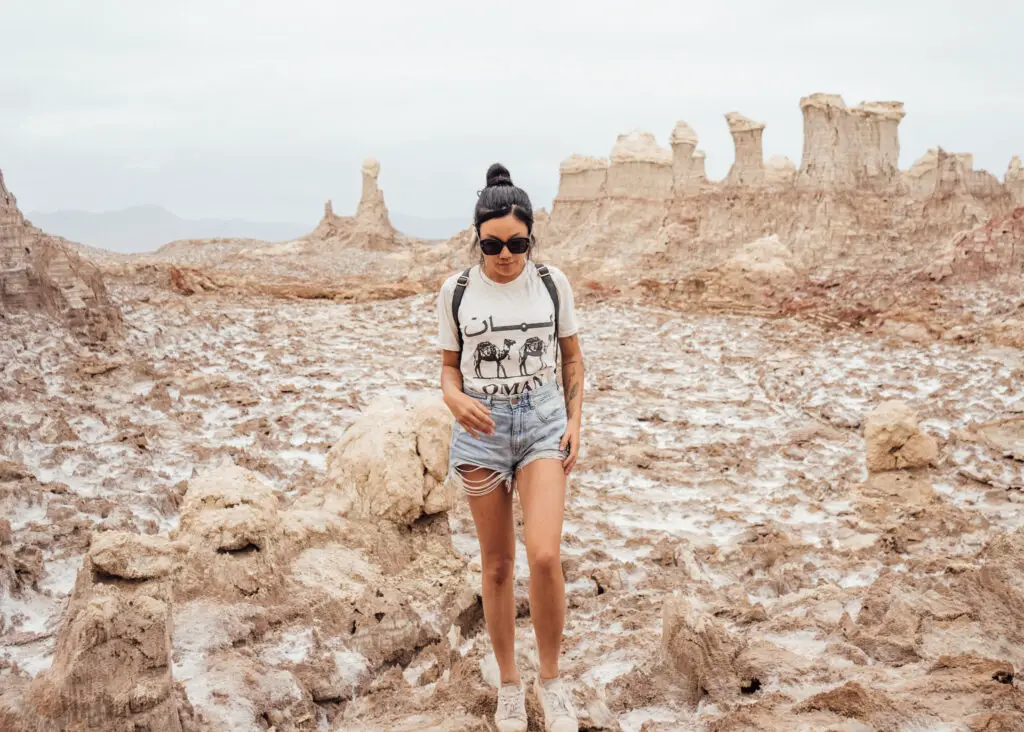
In the photo above, the subject (me) is as tall at the peaks in the background. While I like this photo, it doesn’t capture how big this rocky field was. This photo was taken at eye level.
In the photo above, the cameraman man backed up and found a boulder to stand on. By taking the picture from a higher angle, he was able to capture more of the mid-ground (the white rocky part between me and the peaks in the back).
This creates more depth, and shows us how big this place is. From a higher angle, I am way lower than the background, which emphasizes the size of the peaks as well.
And there you have it! If you implement these simple tips, you should improve your travel photos instantly. You don’t have to be a serious photographer to capture epic moments from your trip, if you just follow some easy rules.
 How to Not Gain Weight as a Digital Nomad
 Best Travel Insurance for International Travel (for Americans)
 How to Make an Income Online and Travel
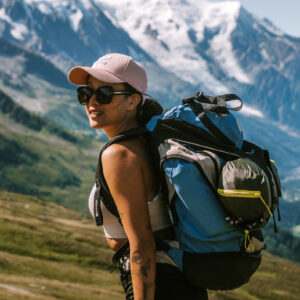 How to Overcome Your Fears to Travel


I have bookmarked this post! My photography skills are not good (oops!) and still learning to improve. Your post provides some real practical doable tips to improve travel photos. Thanks for sharing the tips!
These are some great photography tips! I love experimenting with angles and shooting while crouched down to add more height or capture all of a tall building. You might not think you’re a great photographer, but you have some great shots here 🙂
Great article! Photos are a great opportunity to preserve memories for a long time! And also transfer emotions and beautiful views to friends! I really love to be photographed! Thanks for the great tips for creating beautiful photos!
Your photography is beautiful! What kind of camera and lens do you use? Do you have a post about that?
Hi Lana! No I don’t have a post about that yet, I guess I should make one 🙂 My camera is the Sony alpha 7 ii, most photos are shot on a 28 – 70 mm lens.
cheap clomiphene pills where to buy clomiphene without prescription clomiphene remedio can i order cheap clomiphene for sale how can i get generic clomid pill where can i buy generic clomid without dr prescription where can i get generic clomid price